Introduction:
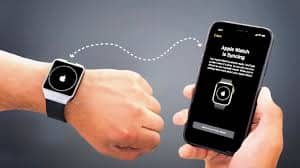
Apple Watch to iPhone is the first step in unlocking a world of convenience and functionality. From tracking your health metrics to managing your notifications, this pairing allows your devices to work in harmony. In this guide, I’ll take you through the entire process, ensuring you have a smooth and successful setup.
What You Need to Get Started
Before you dive into the setup process, it’s important to ensure you have everything you need.
Compatible Devices
First, make sure your devices are compatible. Apple Watch requires an iPhone 6s or later with iOS 14 or later. If your iPhone is older or running an outdated operating system, you’ll need to update or consider a newer model.
Software Requirements
Your Apple Watch should be running watchOS 7 or later. If you’re using a brand new Apple Watch, it should come with the latest software, but it’s always good to check.
Preparing Your iPhone
Your iPhone needs a bit of preparation before you can pair it with your Apple Watch.
Updating iOS
Go to Settings > General > Software Update to check if there’s a new iOS version available. Updating your iPhone ensures compatibility and access to the latest features.
Ensuring Bluetooth is On
Make sure Bluetooth is enabled on your iPhone. Go to Settings > Bluetooth and toggle it on if it’s off.
Setting Up Your Apple Watch
Unboxing your Apple Watch is always exciting. Here’s what you need to do next.
Unboxing and Initial Setup
Take your Apple Watch out of the box and follow the instructions to start it up. This usually involves pressing and holding the side button until you see the Apple logo.
Turning on the Apple Watch
Hold down the side button to power it on. You’ll be greeted with the Apple logo, and soon after, the watch will ask you to bring it close to your iPhone.
Pairing Your Apple Watch with Your iPhone
Now that both devices are ready, let’s pair them.
Automatic Pairing
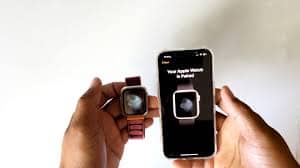
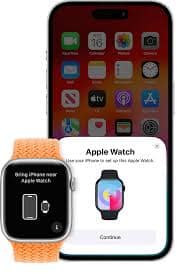
- Hold your Apple Watch close to your iPhone. A pairing screen should appear on your iPhone.
- Tap Continue. If it doesn’t appear, open the Apple Watch app and tap Start Pairing.
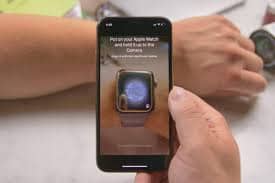
- Align the viewfinder on your iPhone screen with the animation on your Apple Watch.
Manual Pairing
If automatic pairing doesn’t work, you can pair manually.
- Tap Pair Apple Watch Manually on your iPhone.
- Tap the “i” icon on your Apple Watch to view its name.
- Select the corresponding name on your iPhone.
Setting Up Apple Watch Features
With your Apple Watch paired, it’s time to set up its features.
Setting Up Apple ID
Enter your Apple ID password on your Apple Watch to enable features like Apple Pay and iCloud.
Enabling Siri
Follow the prompts to set up Siri, enabling voice commands for added convenience.
Customizing Your Apple Watch
Personalize your Apple Watch to match your style and needs.
Choosing Watch Faces
Browse and select from a variety of watch faces. You can customize them further by changing colors and adding complications (widgets).
Configuring Complications
Complications are small widgets that display information from apps. Customize them to show the data you care about most.
Syncing Apps and Data
Sync your favorite apps and important data between your devices.
Syncing Health Data
Open the Health app on your iPhone and ensure it’s set to sync with your Apple Watch. This allows you to track fitness metrics seamlessly.
Syncing Apps and Notifications
During setup, you’ll be prompted to install available apps that are compatible with Apple Watch. You can also choose which notifications to receive on your watch.
Troubleshooting Pairing Issues
Encountering issues? Let’s troubleshoot.
Common Problems and Solutions
- Connection Errors: Ensure Bluetooth is on and the devices are close together.
- Unresponsive Watch: Restart both your Apple Watch and iPhone.
Resetting Apple Watch
If all else fails, you might need to reset your Apple Watch. Go to Settings > General > Reset on your watch and select Erase All Content and Settings.
Ensuring a Seamless Connection

Keep your devices working well together.
Keeping Devices Close
Your Apple Watch and iPhone communicate via Bluetooth and Wi-Fi. Keeping them within range ensures they stay connected.
Regular Updates
Regularly update both your iPhone and Apple Watch to the latest software versions for optimal performance.
Advanced Settings and Tips
Explore more advanced features and settings.
Using the Apple Watch App
The Apple Watch app on your iPhone is your command center. Use it to customize settings, manage apps, and discover new features.
Exploring Third-Party Apps
Browse the App Store for third-party apps that can enhance your Apple Watch experience, from fitness trackers to productivity tools.
Maintaining Your Apple Watch and iPhone Connection
Regular maintenance helps keep everything running smoothly.
Regular Maintenance
Keep your devices clean and free from dust. Regularly check for software updates and install them promptly.
Battery Life Tips
Optimize battery life by adjusting screen brightness, disabling unnecessary notifications, and using power-saving modes.
Unique FAQs
- How do I unpair and re-pair my Apple Watch?
- Open the Apple Watch app on your iPhone, go to My Watch > All Watches, tap the “i” icon next to your watch, and select Unpair Apple Watch. To re-pair, follow the pairing steps outlined above.
- What should I do if my Apple Watch isn’t connecting to my iPhone?
- Ensure Bluetooth is enabled, restart both devices, and keep them close together. If problems persist, try resetting your Apple Watch.
- Can I pair my Apple Watch with a different iPhone?
- Yes, unpair it from the current iPhone, then follow the pairing process with the new iPhone.
- How do I transfer my Apple Watch data to a new iPhone?
- Backup your old iPhone to iCloud, set up the new iPhone from the backup, and follow the pairing process. Your data will transfer during the setup.
- What should I do if I forget my Apple Watch passcode?
- Place your watch on its charger, hold the side button until you see the power off screen, then press and hold the Digital Crown to reset it. After it resets, you can pair it again
Pingback: how to change Apple ID password - appleratinghub.us